Next-Auth-로그인 구현 (1)
작성일 : 2024.12.24
1. Next.js 프로젝트 생성
npx create-next-app@latest next-auth-login
2. 프로젝트 디렉토리로 이동
cd my-nextjs-app
3. 추가 패키지 설치 (선택사항)
// shadcn 설치
npx --legacy-peer-deps shadcn@latest init
npx --legacy-peer-deps shadcn@latest add button, dialog, card
npm install react-icons

// next-auth 설치 (필수)
npm install next-auth
4. API 라우트 설정
반드시 /app/api/auth/[...nextauth]/route.ts 파일 생성 후 코드 입력
import NextAuth from "next-auth";
import CredentialsProvider from "next-auth/providers/credentials";

const handler = NextAuth({
  providers: [
    // ID, PW 로그인 방식
    CredentialsProvider({
      name: "Credentials",
      credentials: {
        userName: { label: "UserName", type: "text", placeholder: "UserName" },
        password: { label: "Password", type: "password" },
      },

      async authorize(credentials, req) {
        const user = { id: "1", name: "JK", email: "qkrwhd1122@gmail.com" };
        if (user) {
          return user;
        } else {
          return null;
        }
      },
    }),
  ],
});

export { handler as GET, handler as POST };
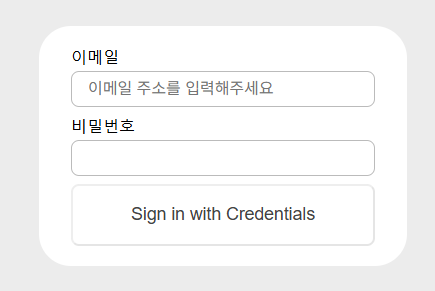
Next-auth에서 기본적인 로그인폼 지원 http://localhost:3000/api/auth/signin 에 이동 시 이런 화면이 나옴

이 화면에서 클릭 시 http://localhost:3000/ 으로 이동됨
Prisma 설정
로그인할 때 authorize() 함수를 통해 사용자 유효성 검증하기 위해 Prisma를 통해 DB를 제어할 예정
Prisma 설치
//prisma 설치
$npm install prisma -D

//prisma 초기화(sqlite 사용)
$npx prisma init --datasource-provider sqlite
위의 두 명령어를 입력했다면 prisma 폴더가 생성되었을 것이다.
이 안에는 schema.prisma 파일이 들어있는데 model 이라고 부른다.
( sqlite, postgreSql, MySql 등에서는 테이블로 전환된다.)
// /prisma/schema.prisma

// This is your Prisma schema file,
// learn more about it in the docs: https://pris.ly/d/prisma-schema

generator client {
  provider = "prisma-client-js"
}

datasource db {
  provider = "sqlite"
  url      = env("DATABASE_URL")
}
generator client - Prisma는 백앤드 영역이기 때문에 Client 쪽에서 DB에 접근하려면 prisma-client가 필요하다.
datasource db : -어떤 DB를 사용할지, 해당 파일의 url을 적어둔다. .env 파일을 보면 DATABASE_URL="file:./dev.db" 라고 추가되어 있는데 dev.db 파일로 sqlite 파일을 저장한다는 뜻이다.
Prisma 공식 홈페이지
에 들어가면 기본적인 User 와 Post 모델 예제가 나와있다.
테이블은 model 로 정의하고 보통 대문자로 선언한다.
Prisma Migrate
스키마 작성을 완료하면 sqlite 파일을 만들어 주어야 한다.
$npx prisma migrate dev --name init
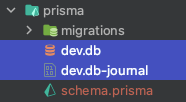
명령어를 실행하면 dev.db & dev.db-joumal 파일이 생성된다.
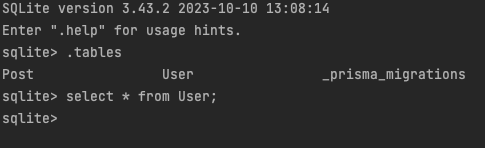
Prisma는 Studio라는 툴을 통해 웹상에서 테이블을 조작할 수 있다.
npx prisma studio
Environment variables loaded from .env
Prisma schema loaded from prisma\schema.prisma
Prisma Studio is up on http://localhost:5555
명령어를 실행하면 테이블을 쉽게 조작할 수 있는 페이지가 나온다.
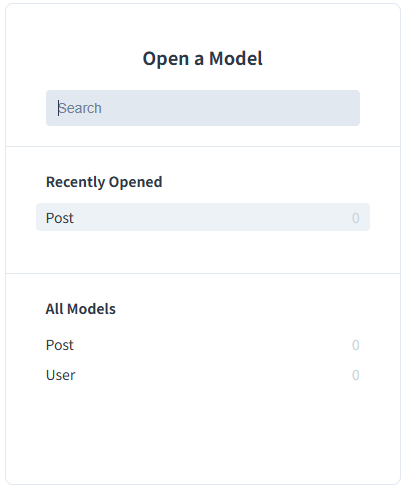
Prisma Client 설치
Prisma 설치는 완료했지만 Next.js 에서 사용하려면 Prisma Client를 설치해 주어야한다.
$npm install @prisma/client
설치가 완료되면 이를 사용하기 위한 모듈을 만들어준다.
// /app/lib/prisma.ts

import { PrismaClient } from "@prisma/client";

const globalForPrisma = global as unknown as { prisma: PrismaClient };

export const prisma = globalForPrisma.prisma || new PrismaClient();

if (process.env.NODE_ENV !== "production") globalForPrisma.prisma = prisma;

export default prisma;
이로써 Prisma 세팅은 완료되었다.
Next.js API 구현
Next.js 앱에서 내부 API를 사용하려면 /app/api 경로에 로직을 구현하면 된다.
13 버전부터는 API 파일은 route.js 로 명명해야 한다.
회원가입(SignUp) 구현
app/api/signup/route.ts 파일을 만들고
https://localhost:3000/api/signup 를 호출해 사용할 수 있다.
//app/api/signup/route.ts

import prisma from "@/lib/prisma";

interface RequestBody {
  name: string;
  email: string;
  password: string;
}

export async function POST(request: Request) {
  const body: RequestBody = await request.json();

  const user = await prisma.user.create({
    data: {
      name: body.name,
      email: body.email,
      password: body.password,
    },
  });

  // user 객체에서 password 값은 제외
  const { password, ...result } = user;
  return new Response(JSON.stringify(result));
}
POST methods 의 body를 request.json()을 통해 추출하고
prisma.user.create 명령어를 통해 User 테이블에 데이터를 넣는다.
데이터가 정상적으로 들어가면 해당 객체를 반환하게 되는데
여기서 비밀번호를 제외한 값을 최종 Response 로 리턴해준다.
🚨 비밀번호를 평문으로 저장하는 방법은 보안적으로 문제가 있다.
자바스크립트에서 많이 사용하는 bcrypt를 통해 비밀번호를 Hash로 암호화할것이다.
$npm install bcrypt
$npm i --save-dev @types/bcrypt
//app/api/signup/route.ts

import prisma from '@/lib/prisma'
import * as bcrypt from 'bcrypt'

~
export async function POST(request: Request) {
	~
  const user = await prisma.user.create({
    data: {
     ~
		password: await bcrypt.hash(body.password,  10) // 변경
    },
  })

~
}
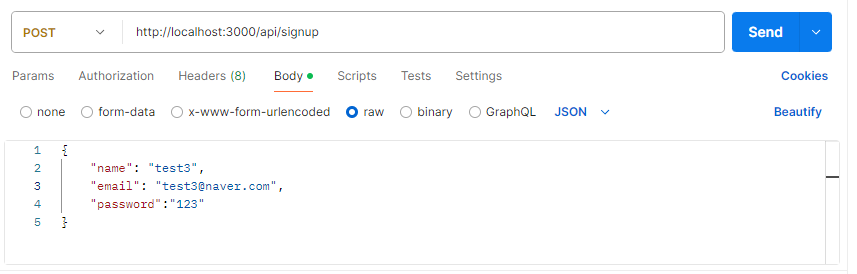
회원가입 API 테스트
위에서 만든 api의 request url은 https://localhost:3000/api/signup 이다.

로그인(SignIn) 구현
회원가입과 마찬가지로 /app/api/signin 경로에 route.ts 파일을 만들어 준다.
//app/api/signin/route.ts

import prisma from "@/lib/prisma";
import * as bcrypt from "bcrypt";

interface RequestBody {
  userName: string;
  password: string;
}

export async function POST(request: Request) {
  const body: RequestBody = await request.json();
  const user = await prisma.user.findFirst({
    where: {
      email: body.userName,
    },
  });

  if (user && (await bcrypt.compare(body.password, user.password))) {
    const { password, ...userWithoutPass } = user;
    return new Response(JSON.stringify(userWithoutPass));
  } else {
    return new Response(JSON.stringify(null));
  }
}
findFirst 를 통해 입력받은 username 과 email 컬럼 값이 동일한 유저를 먼저 찾은 후 bcrypt.compare 함수를 통해 비밀번호를 비교한다.
로그인 API 테스트
위에서 만든 api의 request url은 https://localhost:3000/api/signin 이다.
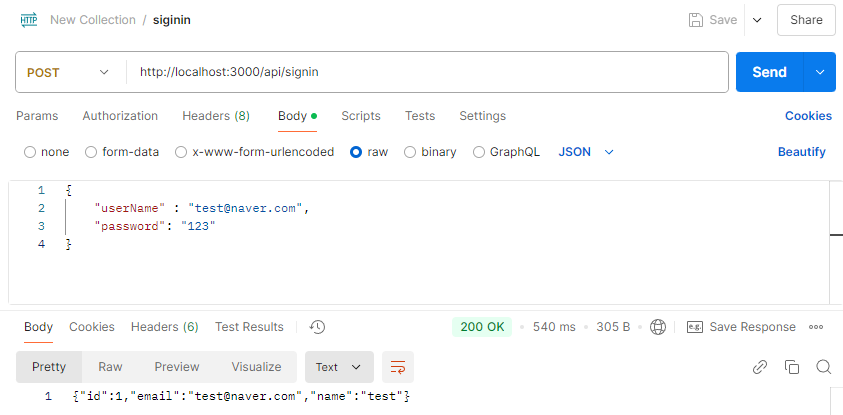
정보가 일치하면 해당 유저 정보를 return 해준다.
로그인 API, NextAuth에 적용하기
만든 API를 next-auth에 적용해야 한다.
// app/api/auth/[...nextauth]/route.ts
import NextAuth from "next-auth";
import CredentialsProvider from "next-auth/providers/credentials";

const handler = NextAuth({
  providers: [
    // ID, PW 로그인 방식
    CredentialsProvider({
      name: "Credentials",
      credentials: {
        userName: {
          label: "이메일",
          type: "text",
          placeholder: "이메일 주소를 입력해주세요",
        },
        password: { label: "비밀번호", type: "password" },
      },

      async authorize(credentials, req) {
        const res = await fetch(`${process.env.NEXTAUTH_URL}/api/signin`, {
          method: "POST",
          headers: {
            "Content-Type": "application/json",
          },
          body: JSON.stringify({
            userName: credentials?.userName,
            password: credentials?.password,
          }),
        });

        const user = await res.json();
        console.log("$$$ user:", user);

        if (user) {
          return user;
        } else {
          return null;
        }
      },
    }),
  ],
});

export { handler as GET, handler as POST };
authorize() 함수를 통해 로그인을 제어한다.
위에서 만든 API를 fetch하고 받아온 사용자 정보를 user에 저장해 리턴한다.
✅ Next-Auth 는 null & false를 리턴하지 않으면 로그인에 성공했다고 판단한다. ✅
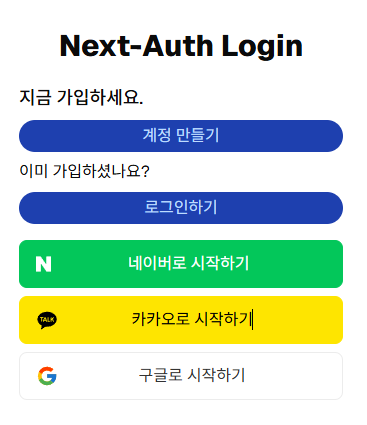
"use client";

import { signIn } from "next-auth/react";
import Socials from "./Socials";
import Link from "next/link";

export default function Form() {
  return (
    <div className="space-y-4">
      <h2 className="mb-5 text-3xl font-extrabold text-center">
        Next-Auth Login
      </h2>
      <div className="space-y-2">
        <h1 className="text-lg font-medium">지금 가입하세요.</h1>
        <Link
          href="/signup"
          className="block bg-blue-800 text-blue-200 text-center py-1 rounded-2xl hover:bg-blue-700"
        >
          계정 만들기
        </Link>

        <h3 className="text-base mt-4">이미 가입하셨나요?</h3>
        <button
          className="w-full bg-blue-800 text-blue-200 py-1 rounded-2xl hover:bg-blue-700"
          onClick={() => signIn()}
        >
          로그인하기
        </button>
      </div>
      <Socials />
    </div>
  );
}
signIn() 함수는 next-auth 에서 제공하는 함수이고, 클릭 시 이전에 봤던 Login Form 화면으로 이동시켜준다.
로그인에 성공할 경우 next-auth 는 💡브라우저 쿠키에 Session 을 저장한다. ☝🏻 Next Auth 자체를 클라이언트 사이드 세션으로도 볼 수 있다.
앱에 Session 적용하기
SesseionProvider 로 컴포넌트를 감싸 하위 컴포넌트들에게 Session 을 공유할 수 있다.
// components/provider/Providers.tsx

"use client";

import { SessionProvider } from "next-auth/react";
import React, { ReactNode } from "react";

interface Props {
  children: ReactNode;
}
function Providers({ children }: Props) {
  return <SessionProvider>{children}</SessionProvider>;
}

export default Providers;
Providers.tsx 컴포넌트를 만들고 /app/layout.tsx에 적용한다.
// app/layout.tsx

export default function RootLayout({
  children,
}: Readonly<{
  children: React.ReactNode;
}>) {
  return (
    <html lang="en">
      <body
        className={`${geistSans.variable} ${geistMono.variable} antialiased`}
      >
        <Providers>{children}</Providers>
      </body>
    </html>
  );
}
로그인 화면 수정
"use client";

import { signIn, signOut, useSession } from "next-auth/react";
import Socials from "./Socials";
import Link from "next/link";

export default function Form() {
  const { data: session } = useSession();
  return (
    <div className="space-y-4">
      <h2 className="mb-5 text-3xl font-extrabold text-center">
        Next-Auth Login
      </h2>
      <div className="space-y-2">
        <h1 className="text-lg font-medium">지금 가입하세요.</h1>
        <Link
          href="/signup"
          className="block bg-blue-800 text-blue-200 text-center py-1 rounded-2xl hover:bg-blue-700"
        >
          계정 만들기
        </Link>
        {session && session.user ? (
          <>
            <h3>{session.user.name}님 안녕하세요!</h3>
            <button
              className="w-full bg-blue-800 text-blue-200 py-1 rounded-2xl hover:bg-blue-700"
              onClick={() => signOut()}
            >
              로그아웃하기
            </button>
          </>
        ) : (
          <>
            <h3 className="text-base mt-4">이미 가입하셨나요?</h3>
            <button
              className="w-full bg-blue-800 text-blue-200 py-1 rounded-2xl hover:bg-blue-700"
              onClick={() => signIn()}
            >
              로그인하기
            </button>
          </>
        )}
      </div>
      <Socials />
    </div>
  );
}
로그인 전
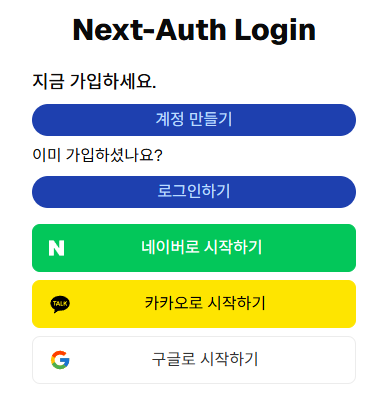
로그인 버튼 클릭 시
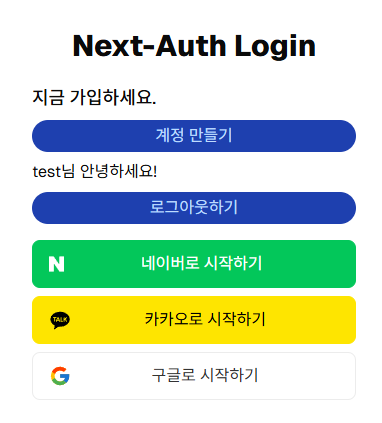
로그인 후